Raspberry Pi has become an essential tool for developers, hobbyists, and tech enthusiasts worldwide. However, as more users adopt this versatile device, ensuring its security becomes increasingly important. One critical aspect of securing your Raspberry Pi is properly configuring the VNC host.allow file. This article dives deep into the steps and best practices for securing your Raspberry Pi VNC setup, ensuring your device remains safe from unauthorized access.
In today's interconnected world, security breaches can have devastating consequences. Whether you're using Raspberry Pi for personal projects, home automation, or professional applications, safeguarding your data and device is paramount. By understanding how to configure and secure VNC host.allow, you can significantly reduce the risks associated with remote access.
This guide is designed for both beginners and advanced users who want to enhance their Raspberry Pi's security. We'll explore key concepts, provide actionable steps, and share expert tips to help you protect your device. Let's get started!
Table of Contents
- Introduction to Raspberry Pi VNC Security
- Understanding VNC and Its Role in Raspberry Pi
- What is the VNC host.allow File?
- Steps to Secure Your VNC Host.allow
- Best Practices for Raspberry Pi VNC Security
- Configuring Firewall for Enhanced Security
- Implementing Encryption for VNC Connections
- Troubleshooting Common VNC Security Issues
- Advanced Security Techniques for Raspberry Pi
- Conclusion and Next Steps
Introduction to Raspberry Pi VNC Security
Raspberry Pi is a powerful yet affordable single-board computer that offers endless possibilities for innovation. However, with great power comes great responsibility. One of the most common use cases for Raspberry Pi is remote access, which is often facilitated through VNC (Virtual Network Computing). While VNC provides convenience, it also introduces potential security risks.
The VNC host.allow file plays a crucial role in controlling access to your Raspberry Pi. By configuring this file correctly, you can restrict who can connect to your device remotely. This section will introduce the basics of VNC security and explain why securing the host.allow file is essential.
Understanding VNC and Its Role in Raspberry Pi
VNC allows users to remotely control another computer or device over a network or the internet. For Raspberry Pi users, VNC offers a convenient way to interact with their devices without needing physical access. This section will delve into the inner workings of VNC and its significance in Raspberry Pi projects.
VNC Basics
VNC operates by transmitting keyboard and mouse inputs from the client to the host, while also sending screen updates from the host to the client. This real-time interaction enables seamless remote control. Key features of VNC include:
- Platform independence
- Support for multiple clients
- Customizable settings for performance and security
VNC on Raspberry Pi
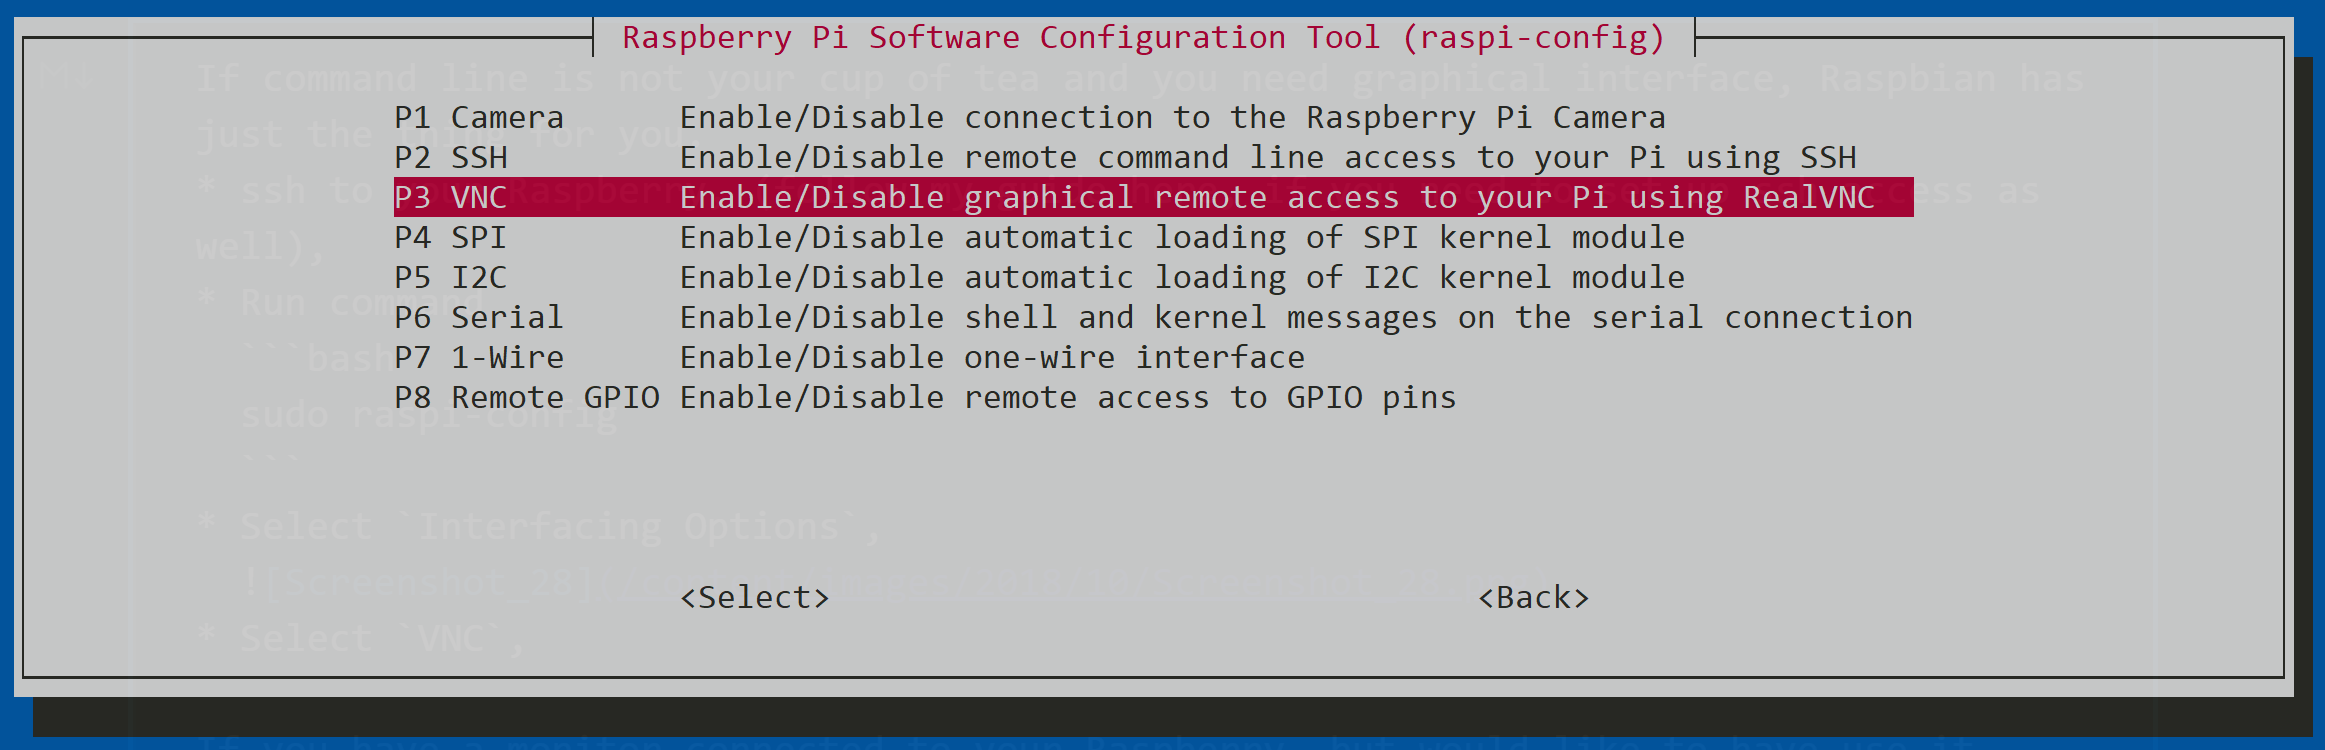
Raspberry Pi supports VNC natively through the RealVNC software, which is pre-installed on the official Raspberry Pi OS. This software provides a secure and efficient way to access your Raspberry Pi remotely. By understanding how VNC works on Raspberry Pi, you can better appreciate the importance of securing your setup.
What is the VNC host.allow File?
The VNC host.allow file is a configuration file that determines which IP addresses or hosts are allowed to connect to your Raspberry Pi via VNC. By default, this file may permit unrestricted access, leaving your device vulnerable to unauthorized connections. Properly configuring host.allow is essential for maintaining control over who can access your Raspberry Pi remotely.
Location of the host.allow File
On Raspberry Pi, the host.allow file is typically located in the /etc/hosts.allow directory. This file can be edited using a text editor like nano or vi. Always back up the original file before making any changes to avoid accidental misconfigurations.
Example Configuration
Here's an example of how to configure the host.allow file to allow only specific IP addresses:
ALL: 192.168.1.100
This configuration restricts VNC access to the specified IP address, enhancing your Raspberry Pi's security.
Steps to Secure Your VNC Host.allow
Securing your VNC host.allow file involves several key steps. This section will guide you through the process, ensuring your Raspberry Pi remains protected from unauthorized access.
Step 1: Restrict Access to Specific IP Addresses
By specifying allowed IP addresses in the host.allow file, you can limit who can connect to your Raspberry Pi. This reduces the risk of unauthorized access from unknown sources.
Step 2: Disable Unnecessary Services
Ensure that only the necessary services are running on your Raspberry Pi. Disabling unused services minimizes potential entry points for attackers.
Step 3: Regularly Update Your Software
Keeping your Raspberry Pi OS and VNC software up to date is crucial for maintaining security. Updates often include patches for known vulnerabilities.
Best Practices for Raspberry Pi VNC Security
Implementing best practices is essential for maintaining a secure VNC setup on your Raspberry Pi. Here are some expert tips to help you protect your device:
- Use strong, unique passwords for VNC authentication
- Enable two-factor authentication whenever possible
- Monitor access logs for suspicious activity
- Limit VNC access to trusted networks
Configuring Firewall for Enhanced Security
A firewall acts as a barrier between your Raspberry Pi and potential threats on the network. By configuring your firewall to allow only necessary traffic, you can further enhance your device's security.
Setting Up a Firewall on Raspberry Pi
Raspberry Pi users can utilize the UFW (Uncomplicated Firewall) tool to manage their firewall settings. Here's how to install and configure UFW:
sudo apt install ufw
sudo ufw allow 5900
sudo ufw enable
This configuration allows VNC traffic on port 5900 while blocking other unnecessary ports.
Implementing Encryption for VNC Connections
Encryption ensures that data transmitted between your Raspberry Pi and VNC client remains secure. By enabling encryption, you can protect sensitive information from interception.
Using SSL/TLS for VNC
RealVNC supports SSL/TLS encryption for secure connections. To enable this feature, follow these steps:
- Generate an SSL certificate for your Raspberry Pi
- Configure VNC to use the certificate for encryption
- Verify that encryption is active during connections
Troubleshooting Common VNC Security Issues
Despite your best efforts, issues may arise when securing your Raspberry Pi VNC setup. This section addresses common problems and provides solutions to help you overcome them.
Issue 1: Unable to Connect to VNC
If you're unable to connect to your Raspberry Pi via VNC, check the following:
- Ensure VNC is enabled in the Raspberry Pi configuration
- Verify that the host.allow file is correctly configured
- Confirm that the firewall allows VNC traffic
Issue 2: Unauthorized Access Attempts
Monitor your access logs regularly for signs of unauthorized access attempts. If suspicious activity is detected, consider updating your VNC settings and strengthening your security measures.
Advanced Security Techniques for Raspberry Pi
For users seeking additional layers of security, advanced techniques can further enhance your Raspberry Pi's protection. This section explores some of these methods.
Implementing a Virtual Private Network (VPN)
A VPN creates a secure tunnel for communication between your Raspberry Pi and remote clients. By routing VNC traffic through a VPN, you can protect your connection from potential eavesdropping.
Using SSH Tunneling
SSH tunneling allows you to securely forward VNC traffic through an encrypted SSH connection. This method provides an additional layer of security for your remote access setup.
Conclusion and Next Steps
Securing your Raspberry Pi VNC host.allow file is a critical step in protecting your device from unauthorized access. By following the steps and best practices outlined in this guide, you can significantly enhance your Raspberry Pi's security. Remember to regularly update your software, monitor access logs, and implement advanced techniques as needed.
We encourage you to take action by reviewing your current VNC setup and making necessary improvements. Share your thoughts and experiences in the comments below, and don't forget to explore other articles on our site for more Raspberry Pi tips and tricks!