SSH to Raspberry Pi remotely is an essential skill for anyone managing a Raspberry Pi device from a distance. Whether you're a developer, hobbyist, or IT professional, understanding how to securely connect to your Raspberry Pi can significantly enhance your workflow. This comprehensive guide will walk you through every step of the process, ensuring you have the knowledge and tools to establish a secure and reliable connection.
In today's interconnected world, remote access to devices is more important than ever. Whether you're working on a project from home, monitoring a server in another location, or troubleshooting a device in a different city, the ability to SSH to Raspberry Pi remotely can save you time and effort. This article will provide you with all the necessary information to set up and maintain a secure connection.
By the end of this guide, you'll understand the basics of SSH, how to configure your Raspberry Pi for remote access, troubleshoot common issues, and ensure your connection remains secure. Let's dive in and explore the world of remote Raspberry Pi management!
Table of Contents
- What is SSH?
- Raspberry Pi Overview
- Setting Up SSH on Raspberry Pi
- Accessing Raspberry Pi Remotely
- Network Configuration
- Security Best Practices
- Troubleshooting Common Issues
- Alternatives to SSH
- Real-World Applications
- Conclusion
What is SSH?
SSH, or Secure Shell, is a protocol designed to securely connect to remote devices over an unsecured network. It provides a secure channel for communication, encrypting all data transmitted between the client and server. This makes SSH an ideal choice for managing devices like Raspberry Pi remotely.
Key Features of SSH:
- Encryption: All data transmitted is encrypted, ensuring privacy and security.
- Authentication: Users must authenticate themselves before gaining access, typically using passwords or public key authentication.
- Flexibility: SSH supports various commands, file transfers, and even graphical applications.
Understanding SSH is crucial for anyone looking to SSH to Raspberry Pi remotely. It ensures that your connection is secure and reliable, protecting sensitive data and operations.
Raspberry Pi Overview
The Raspberry Pi is a small, affordable computer designed to teach programming and hardware interfacing. It has become popular among hobbyists, educators, and professionals for its versatility and ease of use. With its compact size and low power consumption, the Raspberry Pi is an excellent choice for remote management tasks.
Key Features of Raspberry Pi:
- Compact Design: Small form factor makes it ideal for portable projects.
- Low Power Consumption: Efficient power usage, perfect for long-term deployments.
- Customizability: Supports a wide range of operating systems and applications.
When combined with SSH, the Raspberry Pi becomes a powerful tool for remote management, enabling users to perform tasks such as server administration, IoT device monitoring, and more.
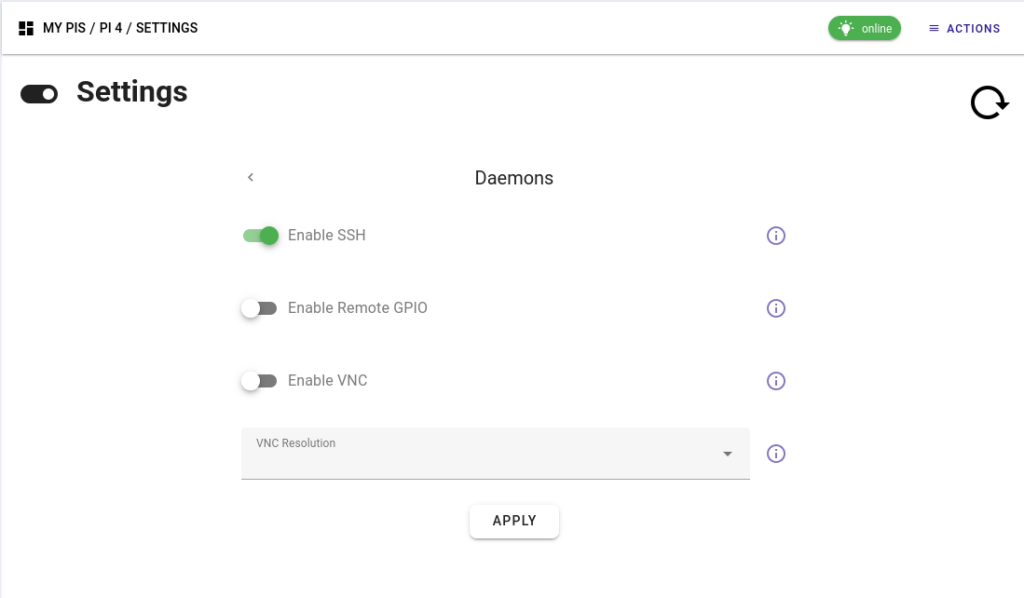
Setting Up SSH on Raspberry Pi
Enabling SSH on Raspberry Pi OS
To SSH to Raspberry Pi remotely, the first step is enabling the SSH service on your device. By default, SSH is disabled on Raspberry Pi OS to enhance security. Follow these steps to enable it:
- Access your Raspberry Pi either directly or via a connected monitor and keyboard.
- Open the terminal and type the following command:
sudo raspi-config. - Select "Interfacing Options" and navigate to "SSH".
- Choose "Yes" to enable SSH and confirm your selection.
- Reboot your Raspberry Pi to apply the changes:
sudo reboot.
Using SSH Keys for Authentication
For added security, consider using SSH keys instead of passwords. This method eliminates the risk of brute-force attacks and provides a more secure authentication process.
Steps to Generate SSH Keys:
- On your local machine, open the terminal and run:
ssh-keygen -t rsa. - Follow the prompts to save the key and set a passphrase (optional).
- Copy the public key to your Raspberry Pi using:
ssh-copy-id pi@raspberrypi.
Accessing Raspberry Pi Remotely
Connecting via SSH Client
Once SSH is enabled on your Raspberry Pi, you can connect to it remotely using an SSH client. On most Linux and macOS systems, the terminal includes a built-in SSH client. Windows users can use tools like PuTTY or the Windows Subsystem for Linux (WSL).
Basic SSH Command:
- Open the terminal and type:
ssh pi@raspberrypi.local. - Enter your Raspberry Pi's password when prompted.
Using a Static IP Address
For consistent remote access, consider assigning a static IP address to your Raspberry Pi. This ensures that the device retains the same IP address, making it easier to connect.
Steps to Set a Static IP:
- Edit the network configuration file:
sudo nano /etc/dhcpcd.conf. - Add the following lines, replacing the placeholders with your network details:
- interface eth0
- static ip_address=192.168.1.100/24
- static routers=192.168.1.1
- static domain_name_servers=192.168.1.1
- Reboot your Raspberry Pi:
sudo reboot.
Network Configuration
Proper network configuration is essential for successful remote access. Ensure that your Raspberry Pi is connected to the same network as your local machine or accessible via the internet. If you're accessing the Raspberry Pi from outside your local network, consider setting up port forwarding on your router.
Port Forwarding Steps:
- Log in to your router's admin interface.
- Locate the port forwarding section and create a new rule.
- Set the external port to 22 (default SSH port) and the internal IP address to your Raspberry Pi's static IP.
- Save the changes and test the connection.
Security Best Practices
Change Default Credentials
One of the easiest ways to improve security is by changing the default username and password. The default username for Raspberry Pi OS is "pi" with the password "raspberry". Modify these immediately to prevent unauthorized access.
Disable Password Authentication
Once you've set up SSH keys, disable password authentication to further enhance security.
Steps to Disable Password Authentication:
- Edit the SSH configuration file:
sudo nano /etc/ssh/sshd_config. - Find the line
PasswordAuthentication yesand change it toPasswordAuthentication no. - Restart the SSH service:
sudo systemctl restart ssh.
Troubleshooting Common Issues
Even with proper setup, issues can arise when trying to SSH to Raspberry Pi remotely. Below are some common problems and their solutions:
- Connection Refused: Ensure SSH is enabled and the Raspberry Pi is connected to the network.
- Host Key Verification Failed: Delete the known_hosts file and reconnect:
rm ~/.ssh/known_hosts. - Timeout Error: Check your network configuration and ensure port 22 is open.
Alternatives to SSH
While SSH is the most common method for remote access, several alternatives exist, each with its own advantages and disadvantages:
- TeamViewer: A user-friendly tool for remote access and support, ideal for beginners.
- VNC: Provides graphical access to the Raspberry Pi desktop, useful for applications requiring a GUI.
- Web-Based Interfaces: Tools like Pi-Web-Admin offer browser-based access, simplifying management tasks.
Real-World Applications
SSH to Raspberry Pi remotely has numerous practical applications across various industries. Below are some examples:
- Home Automation: Monitor and control smart home devices from anywhere.
- Server Management: Manage web servers, databases, and other services hosted on Raspberry Pi.
- IoT Projects: Remotely monitor and interact with IoT devices deployed in the field.
Conclusion
SSH to Raspberry Pi remotely is a powerful tool that can significantly enhance your ability to manage and interact with your devices. By following the steps outlined in this guide, you can set up a secure and reliable connection, ensuring your projects remain accessible and functional from anywhere in the world.
We encourage you to share your experiences and tips in the comments below. Additionally, explore other articles on our site for more in-depth guides and tutorials. Together, let's unlock the full potential of Raspberry Pi and remote management!