Accessing your Raspberry Pi remotely using VNC over the internet from a Windows computer is a powerful way to control your device from anywhere in the world. Whether you're a hobbyist, developer, or IT professional, this guide will walk you through the process step by step. With the right setup, you can efficiently manage your Raspberry Pi remotely without being physically present.
Remote access is essential for many users who need flexibility and convenience. Imagine being able to troubleshoot your Raspberry Pi or run applications on it without needing to be in the same room. This article will cover everything you need to know about accessing Raspberry Pi VNC over the internet from a Windows machine, ensuring a secure and seamless connection.
By following this comprehensive guide, you'll learn how to configure your Raspberry Pi, set up VNC, and establish a secure internet connection. Whether you're new to Raspberry Pi or an experienced user, this guide will provide valuable insights and practical steps to help you achieve your goal.
Table of Contents
- Introduction to Raspberry Pi VNC
- Setting Up Your Raspberry Pi
- Installing and Configuring VNC Server
- Setting Up Port Forwarding
- Using Dynamic DNS for Easy Access
- Installing VNC Viewer on Windows
- Securing Your VNC Connection
- Common Issues and Troubleshooting
- Advanced Settings and Tips
- Conclusion and Next Steps
Introduction to Raspberry Pi VNC
VNC (Virtual Network Computing) allows you to remotely control another computer over a network. When it comes to Raspberry Pi, VNC is an excellent tool for accessing the graphical interface of your device from any computer with an internet connection. This is particularly useful if you want to manage your Raspberry Pi remotely, whether for personal projects or professional tasks.
Using VNC over the internet requires careful setup to ensure both functionality and security. The process involves configuring your Raspberry Pi, setting up your network, and installing the necessary software on your Windows computer. This section will introduce you to the basics of VNC and why it's a popular choice for remote access.
Before diving into the technical details, it's important to note that security should always be a top priority when accessing devices over the internet. We'll cover best practices to ensure your connection remains safe and protected throughout the setup process.
Setting Up Your Raspberry Pi
Installing the Operating System
The first step in accessing Raspberry Pi VNC over the internet is to ensure your Raspberry Pi is properly set up. Start by installing the latest version of Raspberry Pi OS on your device. You can download the operating system from the official Raspberry Pi website and use a tool like BalenaEtcher to write the image to your SD card.
Once the OS is installed, boot your Raspberry Pi and complete the initial setup. Make sure your device is connected to the internet via Wi-Fi or Ethernet. This connection is crucial for enabling remote access.
Enabling VNC on Raspberry Pi
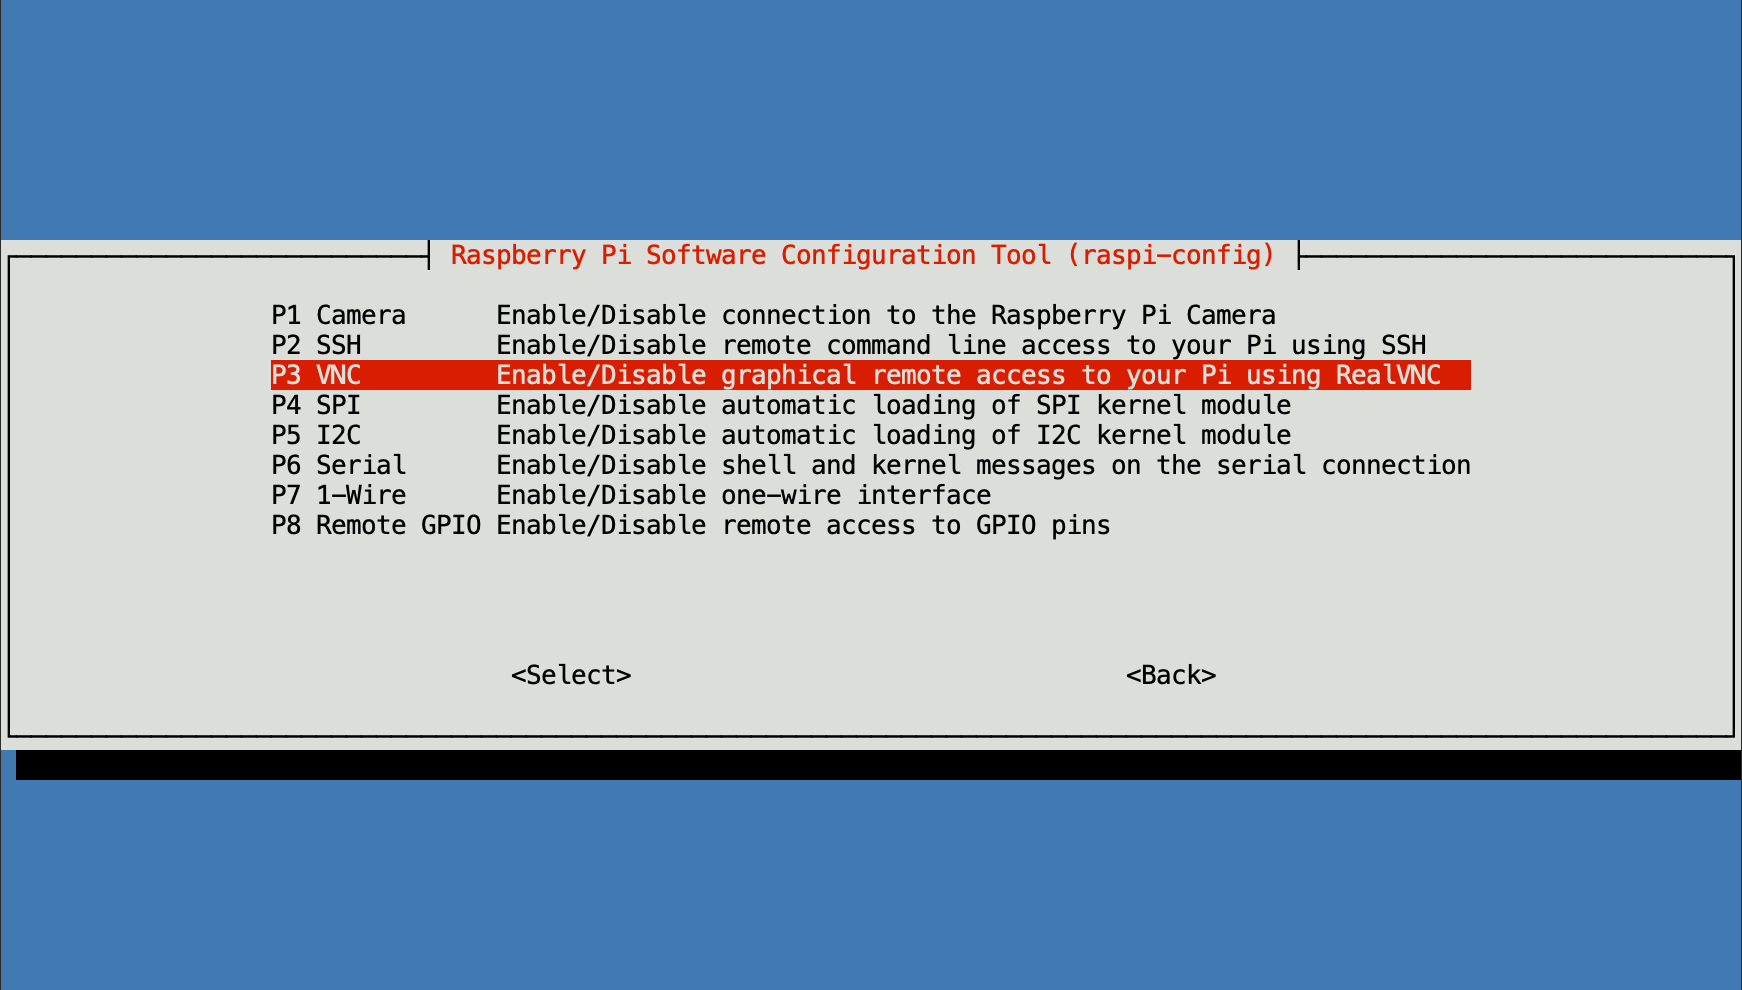
To use VNC, you need to enable the VNC server on your Raspberry Pi. This can be done through the Raspberry Pi Configuration tool. Open the terminal and type:
sudo raspi-config
Navigate to "Interfacing Options" and select "VNC." Enable the VNC server and exit the configuration tool. Your Raspberry Pi is now ready to accept VNC connections.
Installing and Configuring VNC Server
RealVNC is the default VNC server included with Raspberry Pi OS. However, you may want to explore other VNC server options depending on your specific needs. Regardless of the software you choose, the installation process is straightforward.
For RealVNC, simply update your package list and install the server using the following commands:
sudo apt update
sudo apt install realvnc-vnc-server realvnc-vnc-viewer
Once installed, configure the VNC server settings to match your preferences. This includes setting a password for secure access and adjusting display settings if necessary.
Setting Up Port Forwarding
Port forwarding is a critical step in accessing your Raspberry Pi VNC over the internet. It allows external devices to connect to your Raspberry Pi by directing traffic to the correct port on your router. The default port for VNC is 5900, but you can use a different port if needed.
To set up port forwarding, log in to your router's admin panel and locate the port forwarding section. Add a new rule that maps the external port (e.g., 5900) to the internal IP address of your Raspberry Pi and the same port number.
- Log in to your router's admin interface.
- Navigate to the port forwarding settings.
- Create a new rule for port 5900 (or your chosen port).
- Set the internal IP address to your Raspberry Pi's IP address.
Using Dynamic DNS for Easy Access
Dynamic DNS (DDNS) simplifies the process of accessing your Raspberry Pi over the internet by providing a consistent domain name for your changing IP address. Without DDNS, you would need to manually update the IP address every time it changes, which can be inconvenient.
There are several DDNS services available, such as No-IP and DuckDNS. Sign up for a free account, create a hostname, and configure your router or Raspberry Pi to update the DDNS service automatically whenever your IP address changes.
Configuring DDNS on Raspberry Pi
To configure DDNS on your Raspberry Pi, install the necessary client software and follow the instructions provided by your DDNS service. For example, if you're using DuckDNS, you can use the following command to install the client:
curl https://www.duckdns.org/install.sh | bash
Replace "duckdns.org" with your chosen DDNS provider if using a different service.
Installing VNC Viewer on Windows
With your Raspberry Pi configured and your network set up, the next step is to install a VNC viewer on your Windows computer. RealVNC offers a free VNC viewer that is compatible with Raspberry Pi and provides a reliable connection.
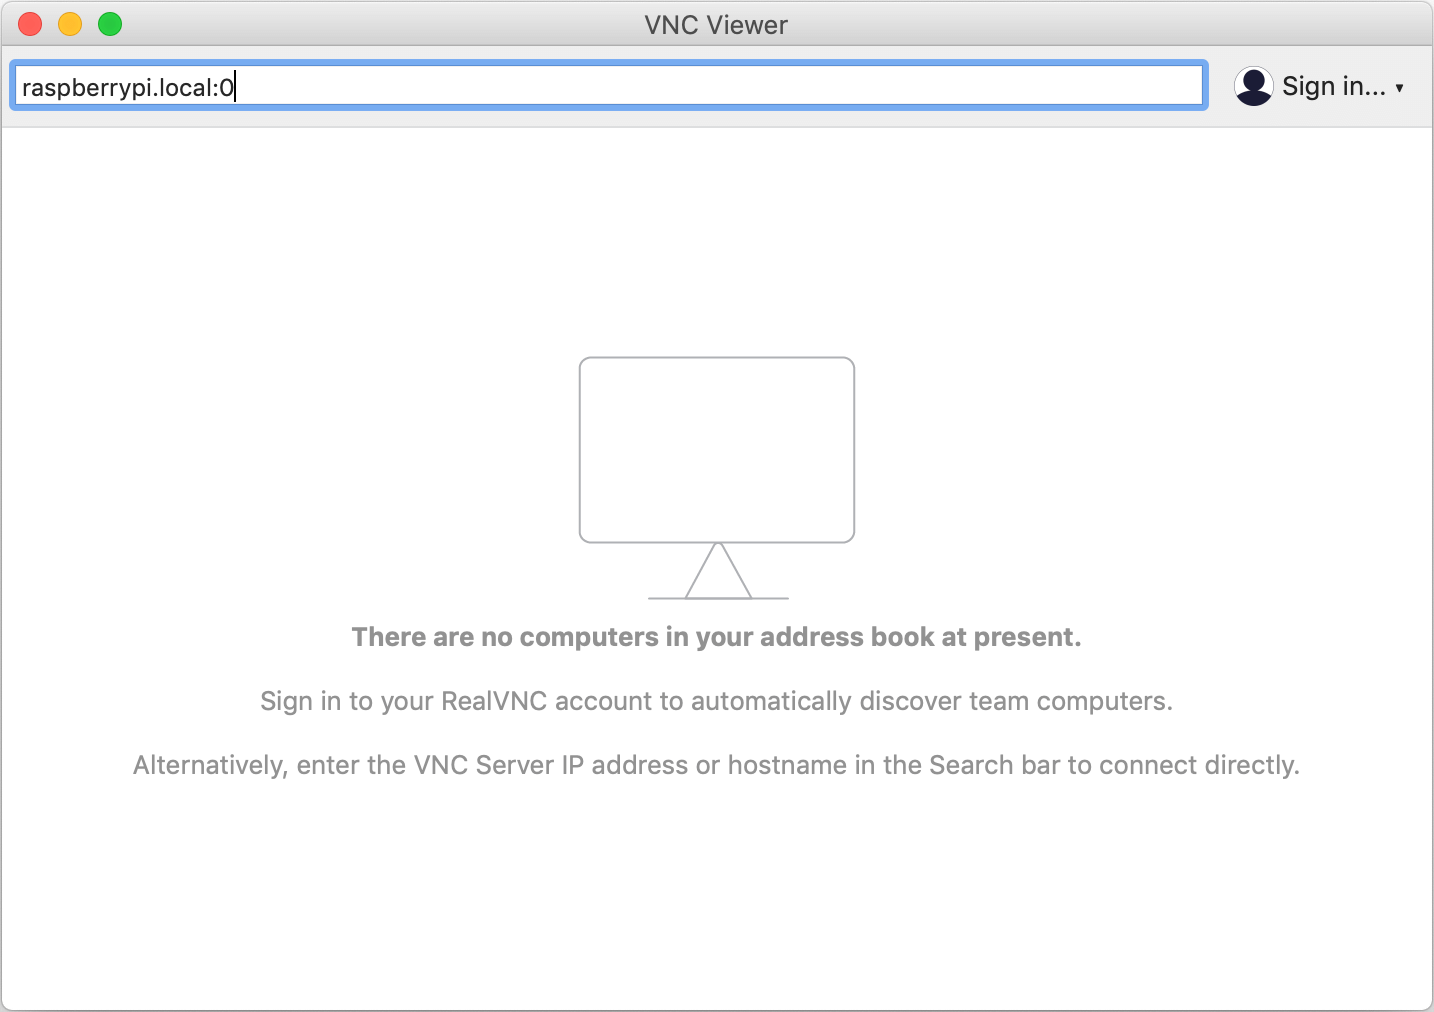
Download the VNC viewer from the official RealVNC website and install it on your Windows machine. Once installed, open the viewer and enter the IP address or hostname of your Raspberry Pi along with the port number (e.g., myraspberrypi.ddns.net:5900).
Connecting to Raspberry Pi
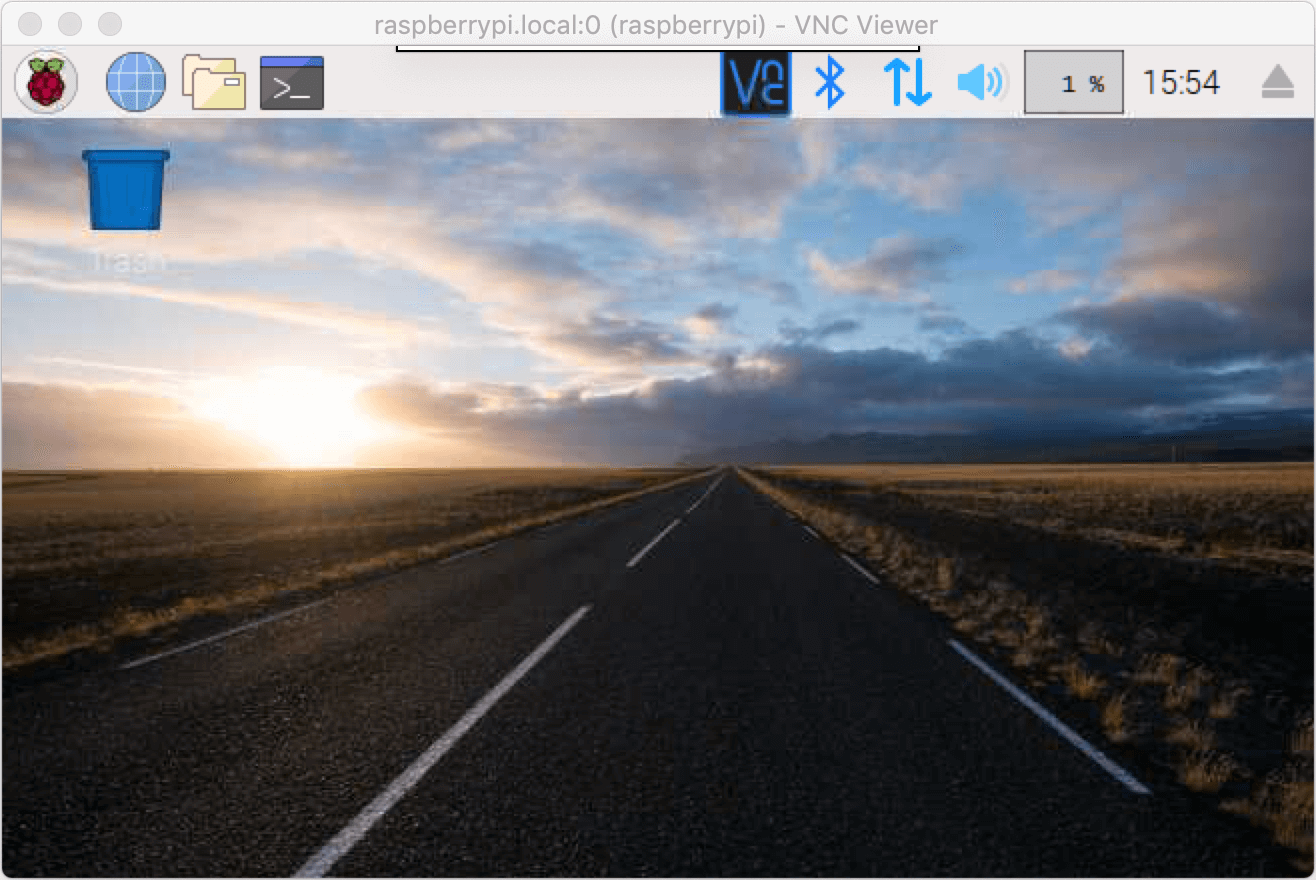
When connecting for the first time, you may be prompted to accept a security certificate. This is normal and ensures the connection is secure. Enter the VNC password you set earlier on your Raspberry Pi and click "Connect." You should now see the desktop of your Raspberry Pi on your Windows screen.
Securing Your VNC Connection
Security is paramount when accessing devices over the internet. While VNC provides a convenient way to control your Raspberry Pi remotely, it's essential to take steps to protect your connection from unauthorized access.
- Use strong passwords for both your VNC server and router.
- Enable encryption to secure the data transmitted between your devices.
- Limit access to specific IP addresses if possible.
- Regularly update your software to patch vulnerabilities.
Consider using a Virtual Private Network (VPN) for an added layer of security. A VPN encrypts all traffic between your devices, making it nearly impossible for attackers to intercept your data.
Common Issues and Troubleshooting
Even with careful setup, you may encounter issues when trying to access your Raspberry Pi VNC over the internet. Below are some common problems and their solutions:
- Connection Refused: Ensure the VNC server is running on your Raspberry Pi and the correct port is forwarded on your router.
- Authentication Failed: Double-check the VNC password and make sure it matches the one set on your Raspberry Pi.
- Slow Connection: Optimize your VNC settings for lower resolution and reduced color depth to improve performance.
- IP Address Changes: Use a DDNS service to avoid issues caused by changing IP addresses.
If the problem persists, consult the official documentation or seek help from online forums dedicated to Raspberry Pi and VNC.
Advanced Settings and Tips
Automating VNC Startup
For convenience, you can configure your Raspberry Pi to start the VNC server automatically on boot. This eliminates the need to manually start the server every time your device reboots. Use the following command to enable this feature:
sudo systemctl enable vncserver-x11-serviced.service
Optimizing Performance
To improve the performance of your VNC connection, adjust the settings to match your network conditions. Lower the resolution and reduce the color depth to minimize the amount of data transmitted. Additionally, disable unnecessary features like desktop effects to further enhance performance.
Conclusion and Next Steps
Accessing your Raspberry Pi VNC over the internet from a Windows computer is a straightforward process when you follow the right steps. By setting up your Raspberry Pi, configuring VNC, and securing your connection, you can efficiently manage your device remotely. This guide has provided you with the knowledge and tools to achieve this goal while maintaining a high level of security.
Now that you've learned how to use Raspberry Pi VNC over the internet, consider exploring other remote access tools and techniques to expand your capabilities. For example, SSH (Secure Shell) offers a command-line interface for remote management, while cloud-based solutions provide additional flexibility and scalability.
Feel free to share this article with others who may find it useful. If you have any questions or feedback, leave a comment below. Don't forget to check out our other guides for more tips and tricks on using Raspberry Pi and related technologies.